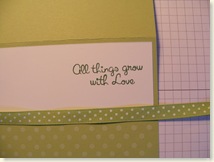
Here's my card. I want to have a ribbon going across the card where the white & green cardstock meet, under my sentiment.

Using my Anywhere Hole Punch and hammer, I punched a hole in my card. I used my punch because my crop-a-dile would not go in far enough.

Lay your ribbon across your card, across the hole.

Very carefully flip your card over keeping the ribbon in the same position. Put one tail end of the ribbon through the hole from the inside of the card.

Now put the other tail through the same hole. It helps if you pull the first tail to the side a little to give you enough room for both tails to go through.

Flip your card back over. Arrange the ribbons so that each tail is on opposite sides of the ribbon that is crossing your card. I like to call them "rabbit ears"!!

Now tie your knot over top of the crossed ribbon. A single knot is usually enough. Now your ribbon and your knot are secure, without glue!!
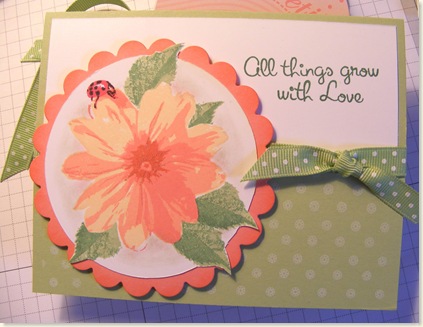
My finished card! This card fulfills Beate's Weekend Sketch; Sharon's Going Buggy Challenge; and Kitchen Sink's June In The Garden Challenge. And thanks again to Pennie for showing me this wonderful technique. Try it out and let me know how you like it!
- Stamps: Boho Backgrounds, Daisy by Kitchen Sink
- Paper: WW, Certainly Celery, Cameo Coral
- Ink: Apricot Appeal, Cameo Coral, Regal Rose, Ruby Red, Certainly Celery, Garden Green, Craft White, Real Red, Basic Black
- Acc: Ribbon, Nesties, Anywhere Hole Punch
Edited to add: Ooops! I was not allowed to use anything but Kitchen Sink stamps for their challenge.....so, I will make a NEW card without the Boho Backgrounds!!! Reading the directions is important!!!


9 comments:
*applause, applause* Standing ovation! Awesome card using those superb Kitchen Sink Stamps, and I LOVE that bow tutorial!!! I can't wait to give it a try! Beautiful card, LeAnne! Best of luck with the contest!
Great tutorial!!
This is awesome! What a wonderful idea! yoooo hoooooo!!
Wonderful tutorial! I may have to invest in some Kitchen Sink stamps soon after seeing that :-)
Beautiful card, LeAnne!
Thanks so much for playing.
Hugs and smiles
Thank you for the little tutorial. I keep coming back to here to refresh my mind on how do it. I decided it was about time I left you a comment telling you how useful your post is!
Great idea! TFS
This is a great tip Leanne Thankyou and your card looks fantastic. xx
Great tutorial and awesome idea for tying a bow!!! Thanks so much
Post a Comment