I have been making some little bags for samples so I thought I would share them with you. The first one is Beate's One Sheet Box. You can find detailed directions here. This is actually one of the projects we made at my stamp club meeting last night.
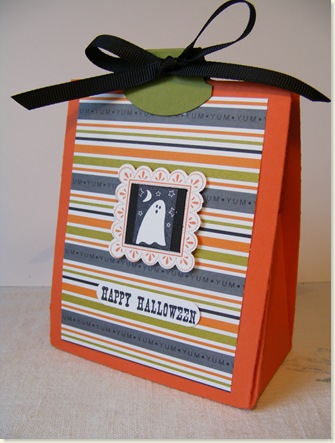
The box/bag was made from one sheet of Tangerine Tango and decorated with Ghostly Greetings DP. I stamped the "thank you" image from Say it with Scallops in TT ink, then punched it out. The little ghost from Holiday Blitz was stamped in black, cut out, then mounted on a small piece of Basic Black to fit right inside the image. The Happy Halloween sentiment from All Holidays, punched out with the Word Window punch, finished it off. I added a couple tab punches on the top and threaded through black grosgrain. You can't see it, but the remaining sides of the box is stamped with IBBG in TT ink too.
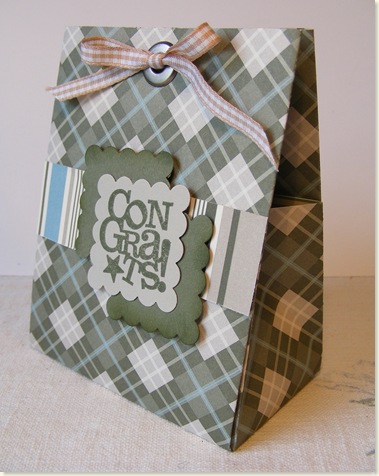
Here is another box I made with the new Manchester DP. I think I prefer making them with DP simply because they are easier to fold. I love this paper for masculine things.
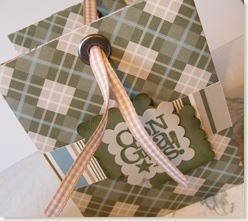
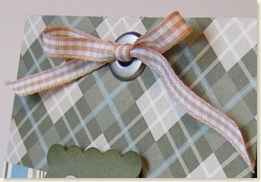
I just added a little strip from the opposite side of the DP as an accent, stamped the Congrats sentiment and mounted it on two Square Scallop punchouts of Always Artichoke. I added a couple jumbo eyelets with my Cropadile and some gingham ribbon. I also wanted to show you how I tie my ribbons on these so the bow is in the front:
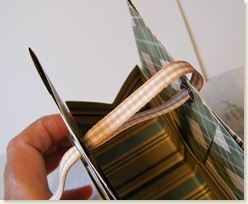 Thread your ribbon through the back & front holes as you normally would, then bring the back ribbon over the top and thread it back through the front hole, from the inside.
Now both tails are coming out the front hole.
From here, you don't even need to tie a knot; you can just form the bow with your tails. Works like a charm!
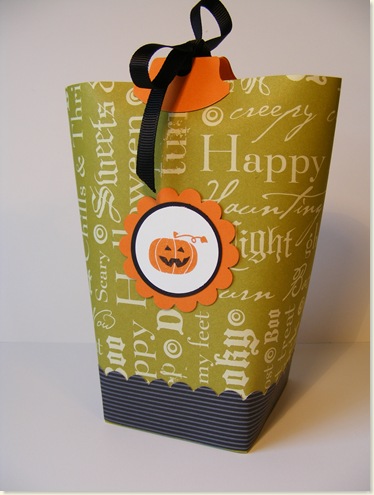
Finally, everybody loves the Bag in a Box, so I thought I would keep in the Halloween theme and make one also. This one I filled with goodies & gave to my hostess.
I got my directions to make this here. And the beauty of these bags is that you can decorate them to your heart's content for any occasion or any theme! Again, I used Holiday Blitz for the image on the front and Ghostly Greetings as my paper. You'll notice I forgot to tie my bow in the front, but that was probably because it was stuffed so full of goodies! Just kidding! The tutorial uses a scallop punch to make the bottom piece, but now that SU has a Scallop Edge punch, it is sooooo much easier! Let's see what you can make!
LeAnne

11 comments:
WOW, LeAnne...I LOVE these!!! I made one of those bags for my stamp girls get together in a few weeks and cannot wait to share it. Nice job on each of them. So, so cute! TFS
Have a great day!
Wendy
Adorable bags. Looks like such fun to create.
Great treat bags, LeAnne! I love that you used the round tab punch on the top of the first one! I'll have to remember that!
These are so cute! What a great idea. What a treat!
Love the bags! I have always steered clear of making my own bags, but I think I can do this. I will have to give it a shot.
These are all so adorable! Just had a look around your blog. You work is all magnificent!
Cute, cute projects! I love them all! I don't have any of the new colors yet, but I'm sure liking the Tangerine Tango and Kiwi, especially. Thanks for sharing all this fabulous inspiration!
These bags are adorable. I am going to have to try making some. What a great idea with the upcoming holidays!
Your bags are great, LeAnne!
Hugs Gisela
These are adorable, LeAnne! I love the cards you've been posting, especially the Thankful Thoughts card. That one is so beautiful!
Lisa
LeAnne, I notice that you don't like awards but I've got such a pretty one that I would love to give to you and I only gave it to the two women with the prettiest blogs. It's at my site.
Post a Comment