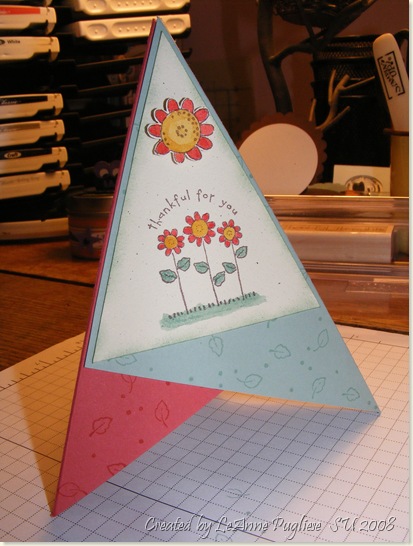
I had a couple requests for instructions on my little teepee card shown in the CTD challenge, so here you go! I'll post the directions first, then the picture! It's rather long but it goes quickly! Again, thanks to Sue Selfridge, my fellow Rubber Dubber, for her demonstration of this card.
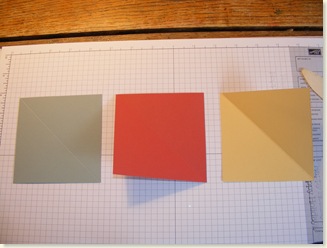
Start by cutting 3 squares of cardstock; in this example, I have cut these 4" so when it is unassembled, it will still fit into an envelope. Score each square diagonally.
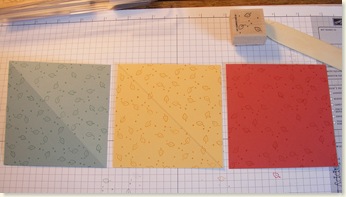
This is the time to stamp your pieces if you like:
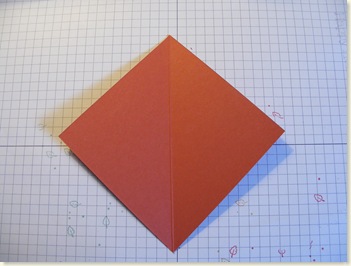
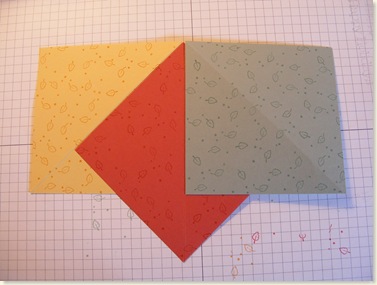
Lay one piece diagonally on your work surface, right side down. The crease should be going up & down (vertically).
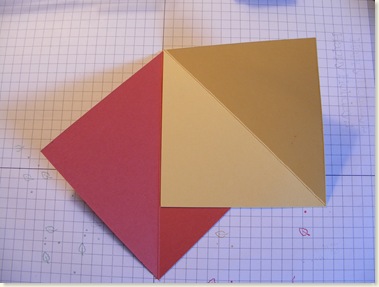
Lay the next piece on top, (as shown), again right side face down. Make sure the edges fit next to the folds snugly; you don't want them right on top of each other, but next to each other so they can be folded easily. Adhere the piece down, making sure you don't put adhesive on the areas that will be exposed on the other side!
Now, flip the whole thing over, and adhere the other square the same way, but with the right side facing out. Again, make sure you don't put adhesive on the exposed areas!
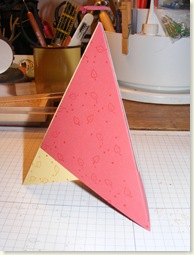
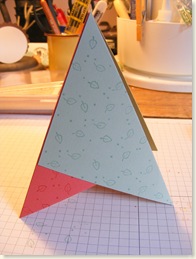
Now fold your card together to see how it fits:
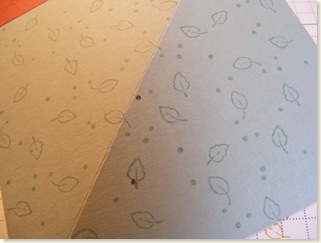
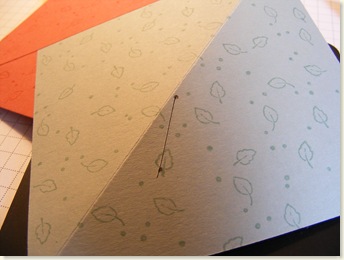
Now, if you just wanted to display your card, you add your decorations and adhere everything together! But if you want to mail your card, you will need to make a little slit for the outer corner to fit into. This way it can be unfolded to go into the envelope. I just marked two pencil marks on either side of the overlapping panel when it was in place. Obviously, I have moved the panel so you can see the marks.
I then cut a slit with my craft blade. You could also just use your cutting blade or a pair of scissors.
Now, you can tuck the corner of the panel into the slit. Just make sure if you decorate this panel, do not glue down the top layer of cardstock at this corner; it makes it a bit too thick to try to get into the slit. Just tuck the bottom layer under.
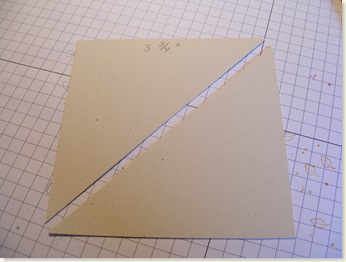
Now to make a smaller layer for decorating, I cut another square 1/4" less than my original square. So I have cut this square 3 3/4". Then I cut it in half diagonally:
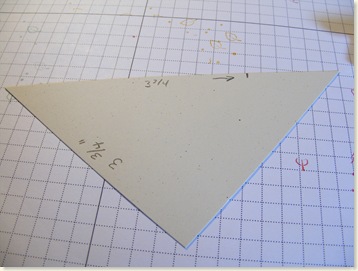
On the diagonal side that you just cut, measure down to 3 3/4". I made a mark--you can see it next to the arrow.
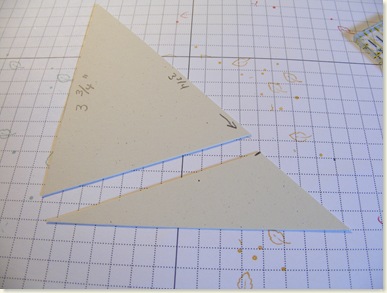
Now cut across the cardstock, from the left corner (shown at bottom center of photo), to the mark. This will give you a panel to layer.
If you want three panels, you can do the other half, then you'll have to cut a second square and repeat the steps. So here is my finished card:
I hope this was helpful! I can't wait to see what you come up with! I would like to add some ribbon, but can't quite figure out how to do that, so if anyone has some ideas, let me know! TFL!
LeAnne
- Stamps: Thoroughly Thankful
- Paper: Sage Shadow, Ruby Red, So Saffron, Naturals Ivory
- Ink: Sage Shadow, Ruby Red, So Saffron, Basic Brown
- Acc: Aquapainter, Dimensionals, Craft Knife


13 comments:
I saw your cards at SCS and they are so sweet. I can't wait to try this! Thank you for the tutorial!
Great tutorial, LeAnne! I definitely gonna try this!
I have seen this before but really couldn't understand how it was constructed. Yours is the best. Thank you for a fantastic tutorial. Can't wait to make one of them tonight.
Wow! This is the cutest card! Thanks for the tutorial!
Thanks for the tutorial. I made one tonight and it was as easy as it looks. Of course, I didn't have time to take a picture of it... It fit in the envelope just like you said!
OMG, leanne, this is just so cool!!!thanks for this wonderful tutorial !!!!tfs:)
chat
Hey LeAnne! Fabulous tutorial! I can't wait to try this tonight. Your card is really fabulous!!!
This is just fabulous, LeAnne! Thanks so much for the tutorial! Customers will love it!
Oh my goodness, this is such a cool card! Thank you for the tutorial!
LeAnne these are SO completely adorable! I found your blog after you left a comment on mine :) You really have great style girl! Even if it's Paper Creations and not floral design hey?? :) You're wonderful at how your creativity comes out!
AND.....I tagged you :) Come and play if you can!
http://christinecreations.blogspot.com/2008/10/totally-random.html
How fun is this card! thanks for the tutorial LeAnne! I've never seen a card like this!
LeAnne,
This is a fabulous card design! I have used your idea and posted two samples to my blog, along with a link to your tutorial. Thanks for the inspiration!
I just found your blog and have been enjoying all of your cards. I came upon this teepee card and it is so cute!!! I am going to take a break from decorating and try one of these today :). Thank you for the instructions!
Barb
Post a Comment